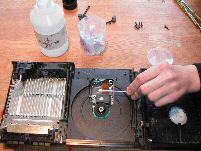
Step 1 – Try a quick check to see if the laser is dirty.
You may find that by opening the disk drawer and blowing hard into the player that you can dislodge some dust. If after doing this you find that the disk now works, the lens probably needs cleaning.Step 2 – Assemble the tools you’ll need.
To perform this your’re going to need to remove the PS2 covers and clean the laser lens. For this you’ll need:- Cross-point screwdriver (large)
- Small flat blade screwdriver
- Watchmaker’s crosspoint screwdriver (small)
- Isopropal alcohol (Isopropanol or Ethanol – similar to Methylated spirits). Available from Maplin
- Cotton buds
- Magnifier (optional)
Step 3 – Remove the screw covers
The PS2 has two types of screw covers. Four rubberised covers - which also act as feet - and four plastic covers. Carefully prise out the covers with a flat bladed screwdriver.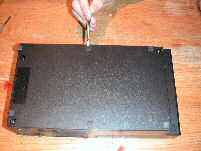
Step 4 – Remove the screws
Remove the eight crosspoint screws. The four on the left of the photo are quite long.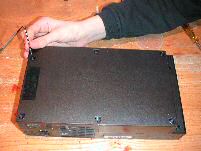
Step 5 – Remove the main cover.
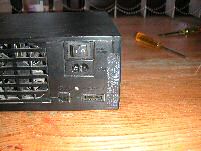
Turn the unit the right way up and have the rear panel facing you. Carefully peel back the tell-tale label that is fitted across the upper and lower covers. Once you peel back this label, a ‘warranty void’ symbol will appear on the label.Carefully manoeuvre the cover over the front connectors and hinge it over to one side. You will need to hinge it as there is a flexible pcb linking to the front panel indicators and switches. See larger version of ‘Remove disk cover’ picture.
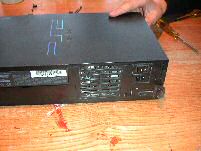
Step 6 – Remove the disk cover.
With the main cover out of the way, use the watchmakers crosspoint screwdriver to remove the four self-tap screws. Then remove the disk cover.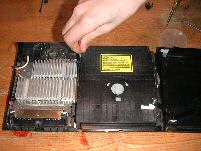
Step 7 – Clean the laser lens
Have a look at the lens first through the magnifier. You can easily see if it’s dust-covered.Using a clean cotton bud, dip it in the isopropanol and gently wipe the lens in one smooth sweeping and twisting movement. Inspect the lens again with the magnifier. It should appear completely clean.
