


I liked this design as
the chamfered legs make the design look less bulky.


This shot also proves the old adage - you can never have enough clamps!


|
|
|
|
|
I liked this design as
the chamfered legs make the design look less bulky.
|
The Ash as delivered from S.L Hardwoods - chosen because they have a good web site and reasonable prices. | Step one was to use the planer to plane all pieces close to finished dimensions. Planing the edges makes excessive us of the part of the blade near the fence so in future I'll use a spacer to even out the blade wear. | Using the router table to ensure the edges are exactly square. The Planer does a reasonable job but the router seems more accurate. | Gluing-up the top using butt joints strengthened with biscuits |
|
|
|
|
|
| The top cramped up. The important thing here is to ensure the top is sat completely flat on the cramps | The drawer was designed to hold our canteen of cutlery. The front joints were to have been dovetailed but I had a lot of trouble with the dovetail cutter working its way out of the collet so I changed the design to butt joints strengthened with biscuits. The double extension drawer runners (Isaac Lord) can be seen in the background. | The non-drawer end of the frame. The mortise and tenon joints were made with the router. | Correcting the first of two mistakes. After routing out the mortise I used a guided 45deg. router bit to put the chamfer on. I didn't spot the guide roller disappearing down the mortise resulting in a deep gouge out of the chamfer. The only solution (apart from a re-make) was to let in a replacement piece - seen here. | |
|
|
|
|
|
| Gluing up the frame. At the drawer end the upper drawer rail is dovetailed in with double dovetails . The lower rail is mortise and tenoned. This can be seen a bit better in the next photo. | Gluing
the
drawer front and mistake number two. The design for the
drawer front was to make it a little wider than the drawer such that
when it was closed the space for the drawer slides would be
hidden. I was paying too much attention to the radio when I
cut the drawer to width. This shot also proves the old adage - you can never have enough clamps! |
I decided to use traditional buttons for fixing the top in a way that would allow for expansion. Here, a rebate cutter is being used to - well - rebate. | The finished buttons. The reason for the rounded tongue will become apparent in the next photo. | I don't know if this idea has been used before but I though I'd try using the biscuit jointer to create the slots for the buttons. I needed to do each one with three different blade height settings but it was was still quite quick and very accurate. |
|
|
|
|
|
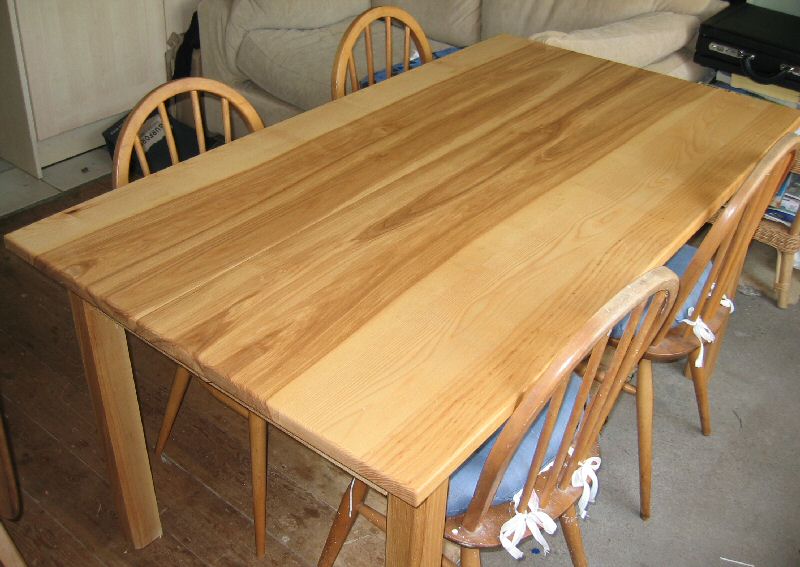
| The finished fixing. The idea seemed to work well. | Almost finished! Rounding the edges of the top with the router. | The finished table
after rubbing down and finishing with three coats of satin
polyurethane varnish (for durability) and then waxed. |
Another view of the finished piece. | And finally ... on this one you can see the mistake with the drawer width. |